How to Do a Quick Weave: A Step-by-Step Guide for Beginners
A quick weave is a simple method of installing hair extensions that offers a natural, protective style without the lengthy commitment of traditional weaving. It involves gluing a hair closure or frontal to the scalp and then attaching bundles of hair over a short period, allowing you to transform your look efficiently and with minimal damage.
This technique is popular because it offers both versatility and speed compared to sewing or braiding methods. It gives the appearance of natural hair growth and is ideal for people who want to switch hairstyles frequently, keep their natural hair protected, and avoid heavy tension on their scalp.
In this article, you'll find detailed instructions on how to do a quick weave at home or in a salon setting, the tools and materials you’ll need, tips to make the process safer and longer-lasting, and ideas for styling and maintaining your weave so it stays fresh and natural-looking.
Preparing Your Hair and Tools for a Quick Weave
Cleaning and Moisturizing Your Natural Hair
Before applying a quick weave, it’s essential to cleanse your hair thoroughly. Wash your scalp and hair with a clarifying shampoo to remove oils, dirt, and product buildup. This step helps the glue adhere better and prevents irritation.
After washing, apply a light leave-in conditioner or moisturizer primarily to your hair strands, avoiding the scalp. This keeps your hair hydrated and reduces breakage while your weave is installed.
- Use sulfate-free shampoo
- Focus on scalp cleanliness
- Avoid heavy oils before weaving
Gathering the Right Tools and Supplies
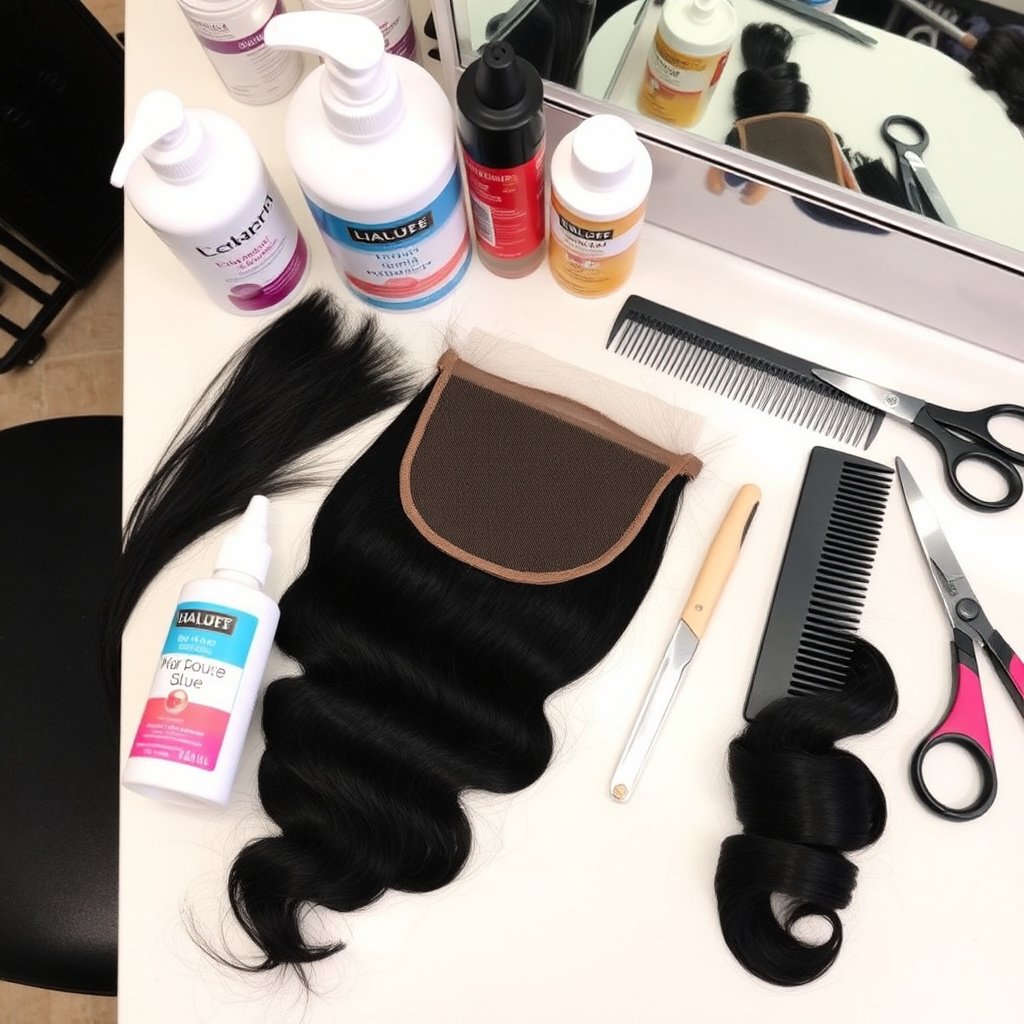
For a successful quick weave, you’ll need a few essential items: quality hair bundles, a hair closure or frontal that matches your hair texture, weave adhesive or glue, a weave brush, and scissors for trimming.
Choose a water-resistant, non-toxic glue formulated specifically for weaves. Selecting a closure that resembles your natural hairline ensures a realistic finish and easier blending.
- Hair bundles (texture & color matched)
- Hair closure or frontal
- Weave adhesive or glue
- Weave brush and comb
- Scissors for trimming
Step-by-Step Process to Install a Quick Weave

Applying the Hair Closure or Frontal
Start by sectioning your hair and flat ironing it down to get a sleek base. Next, apply a thin layer of weave glue along your natural hairline where the closure will sit. Carefully place the closure, making sure it’s aligned correctly and press it down gently.
Allow the glue to set for a few minutes without disrupting the closure. Avoid using too much glue to prevent a noticeable buildup, which can cause discomfort or peeling.
For more on this, see our related guide: Services Offered by Kelly’s Dominican Hair Salon Matthews: A Complete Guide.
Attaching Hair Bundles to Complete the Quick Weave
Once the closure is secure, start trimming the hair bundles to your desired length. Apply glue along the base of each bundle and press it onto your hair starting from the back and moving forward.
Use a weave brush to gently smooth and align the bundles for a natural flow with the closure. Work carefully to avoid lumps and gaps, ensuring even coverage.
Styling and Caring for Your Quick Weave

Recommended Styling Techniques
A quick weave can be styled straight, curled, or braided depending on your preference. Use a heat protectant spray before any heat styling and avoid excessive heat which may damage the hair or adhesive.
Regularly brush your weave with a soft bristle brush to maintain a smooth appearance and prevent tangles, paying extra attention around the closure.
- Use heat protectant
- Avoid heavy styling products
- Brush gently daily
Maintaining Your Weave for Longevity
To keep your quick weave looking fresh, wrap your hair with a satin scarf or bonnet at night. This minimizes friction and reduces shedding. Avoid washing the weave frequently; instead, refresh with a dry shampoo or light spritz of water mixed with leave-in conditioner.
If you notice the adhesive lifting, carefully apply a small amount of glue to reattach the closure or bundles instead of forcing a complete removal, which might damage your natural hair.
- Sleep with satin bonnet
- Avoid frequent washing
- Refresh with light sprays
Troubleshooting Common Issues During a Quick Weave

Dealing with Glue Build-Up and Irritation
If you experience discomfort or itchiness, it might be due to glue buildup or sensitivity. Use a special weave adhesive remover to clean the scalp gently and rinse thoroughly with cool water to soothe irritation.
Try to avoid using harsh chemicals on your skin during removal, and always test adhesive products on a small skin patch before full application.
For more on this, see our related guide: How Long Does a Weave Last? the Complete Answer.
Preventing Shedding and Tangling
Shedding often occurs when the hair bundles are not securely glued or if the hair quality is low. Choose reputable hair brands and ensure glue is evenly applied during installation. Avoid aggressive brushing or pulling your weave.
Regular maintenance of detangling with your fingers or a wide-tooth comb can help extend the life of your weave.
- Apply adhesive evenly
- Use high-quality hair bundles
- Avoid rough brushing
Removing a Quick Weave Safely
Using Adhesive Remover Effectively
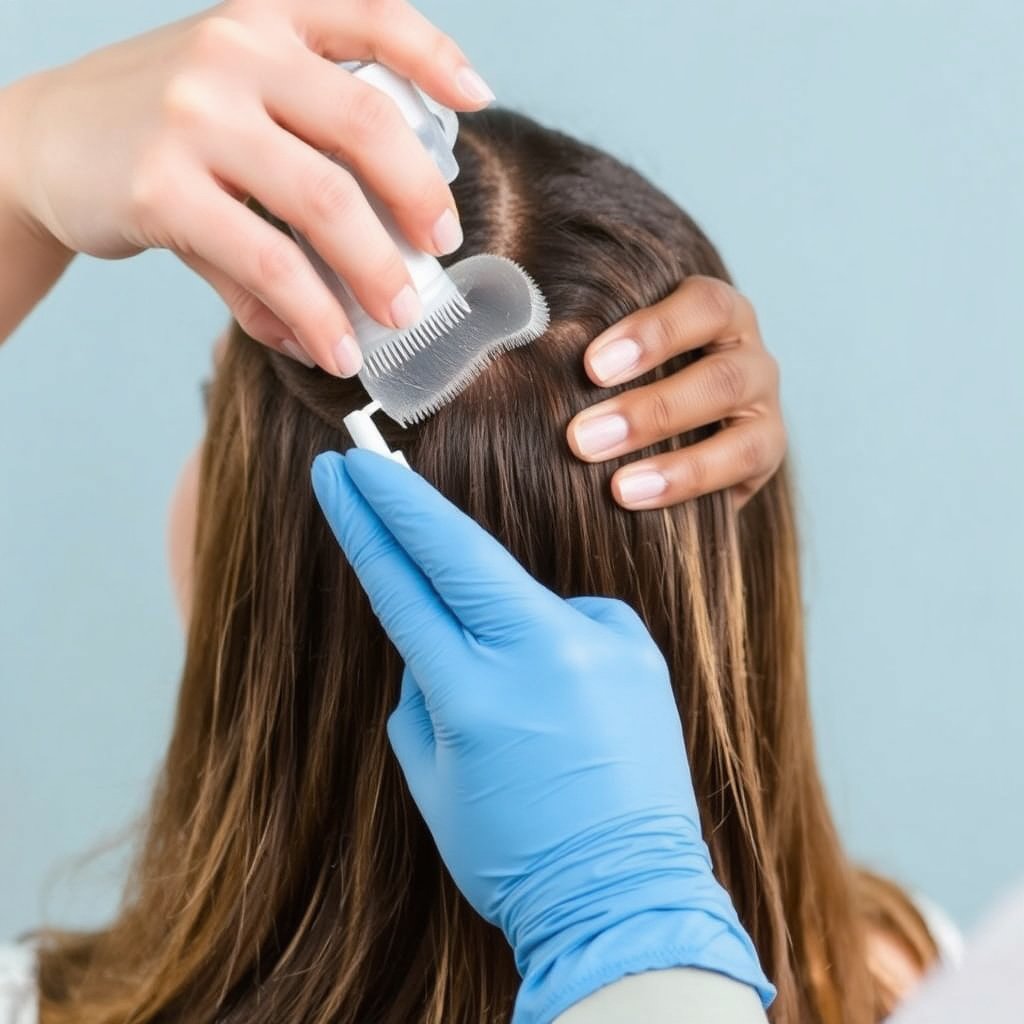
Start by applying a professional adhesive remover around the closure edges and under the glued sections. Allow the solution to soak for several minutes to break down the glue, making it easier to remove the weave without pain or damage.
Do not pull the hair harshly; instead, gently lift the edges bit by bit until the closure and bundles come off.
- Apply adhesive remover
- Wait 5-10 minutes
- Remove slowly and gently
For more comprehensive background information, you can explore detailed weave styling techniques and history on Wikipedia. Weave styling techniques.
Caring for Your Natural Hair After Removal
After taking off the quick weave, wash your hair thoroughly to remove any residue and apply a nourishing deep conditioner to restore moisture. Give your scalp time to breathe and avoid immediate reinstallation to prevent stress and weakening.
Use scalp massages or oils to promote circulation and hair growth post-removal.
Quick Weave Methods Comparison
Here is a comparison of different quick weave options, highlighting ease, durability, and suitability for various hair types and lifestyles.
| Method | Application Time | Durability | Cost | Best For |
|---|---|---|---|---|
| Glue-In Closure Quick Weave | 1-2 hours | 3-4 weeks | $50-$100 | Beginners, short-term style |
| Sew-In Quick Weave | 2-3 hours | 6-8 weeks | $80-$150 | Longer wear, thick hair |
| Tape-In Quick Weave | 1.5-2 hours | 4-6 weeks | $70-$130 | Fine hair, no glue |
| Bonded Quick Weave | 1-1.5 hours | 2-3 weeks | $40-$90 | Budget-friendly, easy removal |
Frequently Asked Questions
Can I do a quick weave at home without professional help?
Yes, you can do a quick weave at home by carefully following step-by-step instructions and using proper tools. However, experience helps ensure a smooth, natural result without damage.
How often should I remove and reinstall a quick weave?
It’s recommended to remove a quick weave every 3 to 4 weeks to avoid scalp irritation and hair damage. This also gives your natural hair time to rest and recover.
Is a quick weave suitable for all hair types?
Quick weaves can work on most hair types, but hair that is very fine or fragile may require gentle glue formulas and closures designed for sensitive scalps.
How do I prevent my quick weave from looking unnatural?
Match your closure color and texture closely to your natural hair and ensure the glue is applied thinly and evenly. Use styling techniques like blending edges and light brushing to maintain a seamless look.
What are signs that my scalp is reacting badly to the weave adhesive?
Redness, itching, burning sensations, or flaking around the glued area may indicate a reaction. If these occur, remove the weave promptly and consult a dermatologist if symptoms persist.
Key Takeaways
- A quick weave uses glue to attach hair extensions and a closure or frontal for natural coverage.
- Proper cleaning and preparation of your hair improve adhesion and comfort.
- Regular maintenance and gentle styling extend the life of your quick weave.
- Safe removal with adhesive remover protects your natural hair and scalp health.
Conclusion
Choosing the right approach to a quick weave involves balancing your desired style, hair condition, and time availability. Focus on quality materials and careful application to minimize risk to your scalp and natural hair. Understanding how the adhesive interacts with your skin and hair texture also guides you in making safer choices.
For those seeking an easy, short-term enhancement, glue-in closure quick weaves are accessible and versatile. If you want longer durability, sew-in or tape-in quick weaves might serve better. Budget-conscious users can opt for bonded quick weaves that offer simplicity and relatively quick removal. Each method has its merits depending on your needs and hair type.
Before beginning, gather all supplies and give yourself enough time to install carefully without rushing. After installation, practice gentle care techniques paying attention to the closure and bundles. When it’s time to remove, use a proper adhesive remover and allow your hair to rest before reinstalling. This measured approach helps maintain both the beauty of your weave and the health of your natural hair.