How to Do a Sew In Weave: Step-by-Step Guide for Beginners
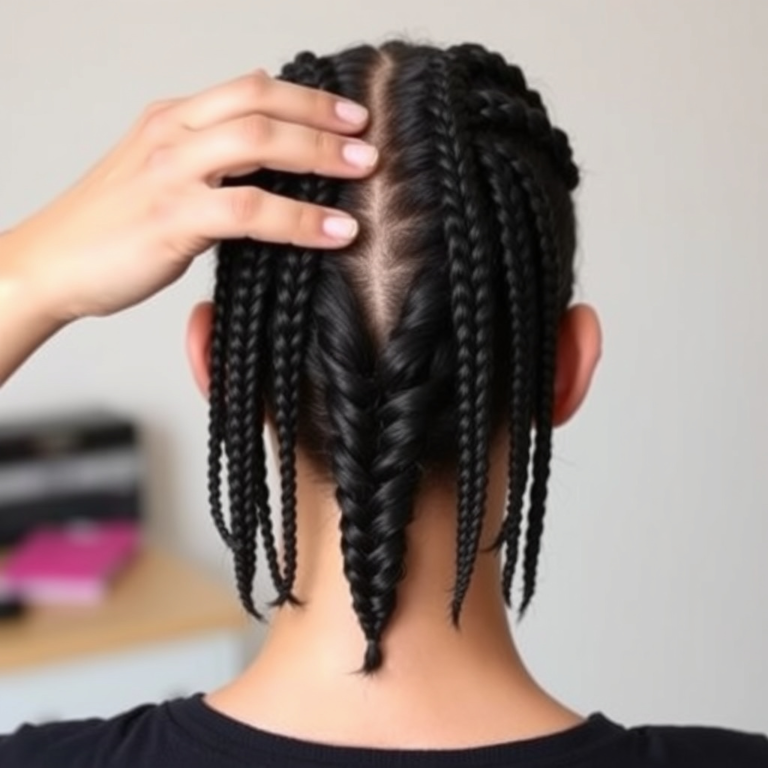
Doing a sew in weave involves braiding your natural hair into cornrows and then sewing hair extensions onto the braids using a needle and thread designed for hair. This technique secures the extensions firmly while protecting your natural hair underneath.
Sew in weaves are popular because they offer a natural-looking way to add length, volume, and different textures without the use of glue or heat. Doing it correctly matters to avoid tension that could damage your scalp or hair and to ensure the weave lasts as long as possible.
This article will walk you through everything you need to know, from preparing your natural hair and selecting the right tools, to creating the cornrows and attaching the wefts securely. Additionally, you'll learn about aftercare to keep both your natural hair and weave healthy.
Preparing Your Hair for a Sew In Weave

Deep Cleansing and Conditioning
Before installing a sew in weave, thoroughly cleanse the scalp and hair to remove oils, dirt, and buildup. Use a moisturizing shampoo that suits your hair type, followed by a deep conditioner to restore moisture and prevent dryness beneath the weave.
This preparation ensures your natural hair is healthy, more pliable for braiding, and less likely to suffer damage or irritation under the weave.
- Use sulfate-free shampoo
- Rinse with cool water to seal cuticles
- Apply a leave-in conditioner
Detangling and Sectioning Hair
After washing and drying, detangle your hair completely using a wide-tooth comb or detangling brush to prevent breakage during braiding. Next, section your hair evenly to prepare for cornrow braiding. Accurate parting keeps the braids neat factory-like.
Using hair clips or bands helps keep sections separate, enabling the stylist to braid clean, uniform cornrows, which form the foundation for sewing in the wefts properly.
Braiding Techniques for Sew In Weaves

Creating Durable Cornrows
Cornrows for sew in weaves should be tight but not painfully so. They need to lie flat against the scalp, forming a base sturdy enough to support the weight of the sewn-in hair without slipping or causing scalp tension.
Planning your braid pattern matters; common styles include straight back rows or curved patterns depending on desired final look. Avoid crossing braids to prevent uneven surfaces that complicate sewing.
- Tighten braids evenly
- Avoid gaps between braids
- Keep scalp moisturized to reduce discomfort
Braiding Length and Coverage
For optimal sew in weaves, braid lengths should be about 1 to 1.5 inches long so that the wefts can be sewn securely. Too short and the braid will not hold the thread properly; excessively long braids may create lumps and discomfort.
Proper braid coverage across the scalp prevents the natural hair from showing through and provides an even foundation on which the hair extensions will lie smoothly.
Sewing in the Hair Extensions
Choosing the Right Needle and Thread
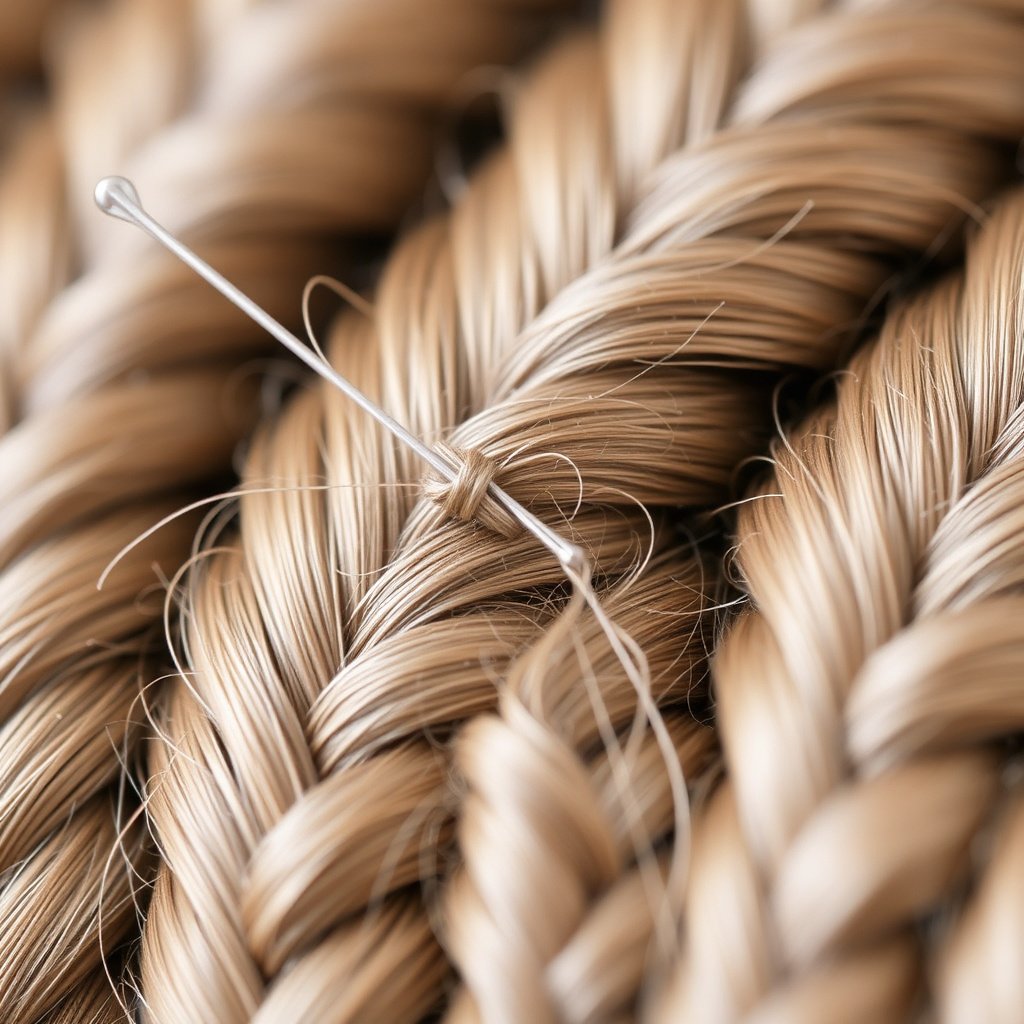
Use a curved weaving needle and synthetic or cotton thread designed specifically for sewing hair weaves. The needle’s curve makes it easier to maneuver under the braids, while thread strength ensures the hair extensions remain securely in place.
Avoid regular sewing thread, which may break easily or irritate your scalp, and pick thread colors that blend with your natural hair and weave for a polished look.
- Use curved weaving needle
- Select thread color matching hair
- Avoid polyester threads
For more on this, see our related guide: Services Offered by Kelly’s Dominican Hair Salon Matthews: A Complete Guide.
Sewing Technique for Secure Attachment
Begin sewing at the nape by anchoring the thread to the braid and looping over the edge of the weft. Stitch in a figure-eight pattern, circling around the braid and extension weft multiple times to secure firmly without pulling too tight.
Continue sewing wefts side by side, maintaining tight airflow and blending extensions evenly to avoid lumps. Knot the thread securely at the end of each weft to prevent unraveling.
- Start at the nape
- Avoid excessive tension
- Stitch over each weft 3-4 times
Styling and Blending Your Sew In Weave

Cutting and Layering for Natural Look
Once sewn in, trim the extensions to blend with your natural hair length and desired style. Layering can help to create movement and reduce bulk, giving the weave a natural finish.
Professional stylists often cut while the weave is installed, allowing them to shape the hair to your face and personal preferences precisely.
Blending Textures and Colors
If your natural hair texture differs from the weave, consider curling, straightening, or texturizing both your hair and extensions for a uniform appearance. Similarly, choosing extensions that match your hair color exactly or adding highlights can improve seamless blending.
Be cautious using heat tools repeatedly, and apply protective sprays to maintain healthy hair and avoid damage.
Aftercare and Maintenance of Sew In Weaves

Cleaning and Moisturizing Routine
Wash your sew in weave carefully every 1-2 weeks to keep the scalp clean. Use diluted shampoo and conditioner to avoid loosening the stitching. Moisturize the scalp regularly with light oils or leave-in conditioners to prevent dryness and itching.
Proper aftercare extends the life of the weave and keeps natural hair healthy beneath.
- Use sulfate-free diluted shampoo
- Moisturize scalp weekly
- Avoid heavy oils that cause buildup
For more on this, see our related guide: Crochet Braids vs. Sew in: Which Is Better?.
Protecting Your Weave While Sleeping
At night, wrap your hair with a silk or satin scarf or bonnet to reduce friction and preserve style. Consider sleeping on silk pillowcases if scarves are uncomfortable, which also protect hair strands from breakage.
Removing the weave regularly, around every 6-8 weeks, prevents matting and helps maintain scalp health.
- Use satin or silk scarf
- Avoid cotton pillowcases
- Schedule regular removal appointments
Common Mistakes to Avoid with Sew In Weaves

Overtightening Braids and Thread
One frequent error is making the braids or thread stitches too tight, which can cause scalp pain, hair breakage, or traction alopecia. The goal is firm but gentle tension that secures the weave without compromising scalp or hair health.
If you experience tenderness or severe discomfort during installation, pause and adjust before continuing.
For a broader understanding of hair weaving techniques, you can explore this detailed overview from Wikipedia. Sew-in weave information from Wikipedia.
Neglecting Proper Scalp Care
Ignoring scalp care while wearing a sew in weave can lead to dryness, itchiness, or buildup, which harbor bacteria and cause discomfort. Maintaining scalp hygiene and moisturizing regularly keeps your hair environment healthy.
Avoid using heavy, greasy products, which can clog pores and affect both scalp condition and weave lifespan.
- Avoid greasy products
- Cleanse scalp regularly
- Apply light moisturizers
Types of Sew In Weave Methods Compared
Here is a comparison of popular sew in weave styles to help you decide which method suits your needs best.
| Method | Installation Time | Durability | Cost | Scalp Comfort |
|---|---|---|---|---|
| Traditional Sew In | 2-3 hours | 6-8 weeks | Moderate | High |
| Invisible Part Sew In | 3-4 hours | 6-8 weeks | Higher | Moderate |
| Full Cap Sew In | 2-3 hours | 4-6 weeks | Lower | High |
| Partial Sew In | 1-2 hours | 4-6 weeks | Low | Very High |
Frequently Asked Questions
How often should I wash my sew in weave?
It is best to wash your sew in weave every 1 to 2 weeks using diluted shampoo to keep your scalp clean without loosening the weave.
Can sew in weaves damage my natural hair?
If installed and maintained properly with gentle tension and good scalp care, sew in weaves should not damage natural hair. Avoid overtightening braids or thread.
What is the difference between a sew in weave and clip-ins?
Sew in weaves are braided and sewn tightly for longer-term wear, while clip-ins are temporary and can be attached or removed daily without braiding.
Can I style a sew in weave with heat tools?
Yes, you can use heat styling tools to blend textures but use heat protectants and avoid excessive heat to maintain hair health.
When should I remove my sew in weave?
Most sews should be removed after 6 to 8 weeks to prevent matting and allow your natural hair to rest and be cared for.
Key Takeaways
- Start with clean, detangled hair for best braid foundation.
- Cornrow braids should be tight but comfortable for lasting hold.
- Use proper weaving needles and thread for secure attachment.
- Maintain your weave with gentle washing and scalp moisturizing.
Conclusion
Deciding how to do a sew in weave requires understanding several key factors: preparing your natural hair, creating firm yet comfortable cornrows, and sewing in extensions properly. This process protects your scalp and hair while allowing for flexible styling options and long-lasting results. Paying attention to the tension of braids and stitching is essential to prevent hair damage and scalp irritation, making your weave both safe and beautiful.
If you're new to sew ins, traditional sew in weaves offer reliable durability and comfort, ideal for those wanting longer wear. For a subtler appearance, invisible part sew ins provide a more natural parting at a slightly higher cost and installation time. Partial sew ins and full cap styles can be useful for different hair volumes and lifestyle needs. Selecting according to your hair condition and daily routine enhances both comfort and style.
Once you choose your method, invest time in aftercare including regular washing with gentle shampoos, moisturizing the scalp, and protecting your weave when sleeping with satin scarves. These steps not only extend your hairstyle's lifespan but support the health of your natural hair underneath. If uncertain, consulting a professional stylist to assist with installation and maintenance is a great way to start confidently.